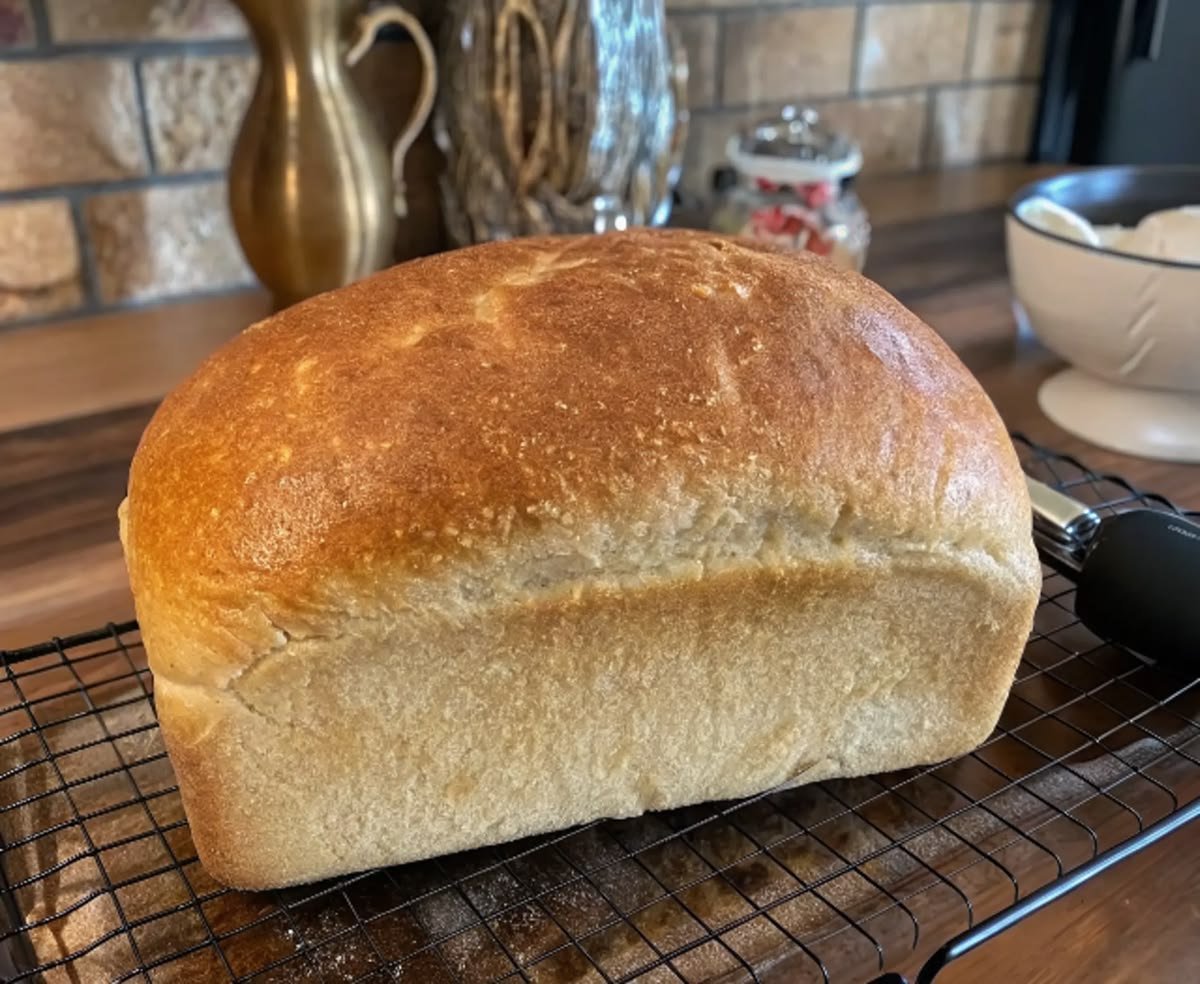
Let’s be real—this is the loaf that actually handles business. Not the crusty, crack-your-jaw type. This is that soft, sliceable, stack-friendly bread that holds up under grilled cheese pressure, PB&J overload, or a fully loaded sandwich situation.
It’s got that subtle sourdough tang, a smooth crumb (no random holes messing up your spread), and just enough richness to keep it soft for days. Basically? This is your everyday loaf with main character energy.
🍞 What Makes This One Different
This isn’t your rustic bakery boule. This one’s built for real-life use:
- Tight, even crumb (aka no holes ruining your sandwich)
- Soft, flexible slices that don’t fall apart
- Light tang, not overpowering
- Clean shape for perfect cuts every time
The upgrade comes from a few key moves:
- Milk instead of just water → softer texture
- Butter or oil → richness + longer shelf life
- Honey/sugar → slight sweetness + moisture lock
- Loaf pan → structure + uniform slices
🧾 Ingredient Lineup (1 Loaf)
Dough Base:
- 100g active sourdough starter (bubbly + at peak)
- 300g warm milk
- 30g honey or sugar
- 30g melted butter (or neutral oil)
- 9g salt
- 500g bread flour (or unbleached all-purpose)
Optional Boosts:
- Milk powder (extra softness)
- Whole wheat flour (for depth)
- Olive oil (for added tenderness)
👩🍳 Let’s Run It
1. Starter Check (Don’t Skip This)
Your starter needs to be active, not lazy.
You want:
- Doubled or tripled in size
- Bubbly texture
- Slight dome on top
- Clean tangy smell (not harsh)
Weak starter = weak loaf. Simple.
2. Mix the Base
In a bowl, combine:
- Starter
- Warm milk
- Honey
- Butter
Mix till mostly smooth.
Add flour + salt and mix into a rough dough.
It should feel soft, slightly tacky—not runny.
Let it sit 20–30 minutes. This rest makes everything easier later.
3. Knead It Right
Knead until:
- Smooth surface
- Slight bounce-back when pressed
- Soft but not sticky feel
(8–10 mins by hand / 5–6 mins mixer)
If it feels too wet, don’t panic—let it rest and it’ll tighten up.
4. First Rise (Bulk Ferment)
Place dough in a lightly oiled bowl, cover it.
Let it rise until doubled (about 4–6 hours depending on temp).
You’re looking for:
- Slight dome on top
- Soft jiggle when moved
- Finger press leaves a slow mark
Optional: do a stretch & fold halfway for better structure.
5. Shape Like a Pro
- Flatten into a rectangle
- Fold like a letter
- Roll into a tight log
Tension matters—this is what gives you that clean, even crumb.
Place seam-side down into your loaf pan.
6. Final Rise
Let it rise until it peaks about 1 inch above the pan edge.
This takes 2–4 hours.
Don’t rush this. Underproofed dough = dense, tearing slices.
Optional move: refrigerate overnight for a slower proof.
7. Bake Phase
Bake at 375°F (190°C) for 40–45 minutes.
You’re done when:
- Top is golden
- Sounds hollow when tapped
- Internal temp ~200°F
If it browns too fast, loosely cover with foil near the end.
8. Cool Down (Yes, You Have To)
Take it out, let it cool at least 1 hour.
Cutting early = gummy texture. Let it set properly.
🔥 Texture + Flavor Breakdown
- Fine, even crumb (no chaos inside)
- Soft but sturdy slices
- Mild tang with a hint of sweetness
- Rich but not heavy
This is that bread that works with everything.
🧊 Storage Moves
- Counter: 3–4 days (wrap it well)
- Fridge: skip it—dries it out
- Freezer: slice first, store up to 2 months
💡 Remix Options
- Whole wheat blend: swap 25–30% flour
- Ultra-soft mode: add milk powder or mashed potato
- Less tang: shorten rise time
- More tang: slow ferment or overnight proof
❤️ Final Take
This sourdough sandwich bread is your weekly staple, not a one-time flex. It’s reliable, adaptable, and actually practical for everyday use.
Once you’ve made it a few times, you’ll stop watching the clock and start reading the dough—and that’s when you know you’ve leveled up.