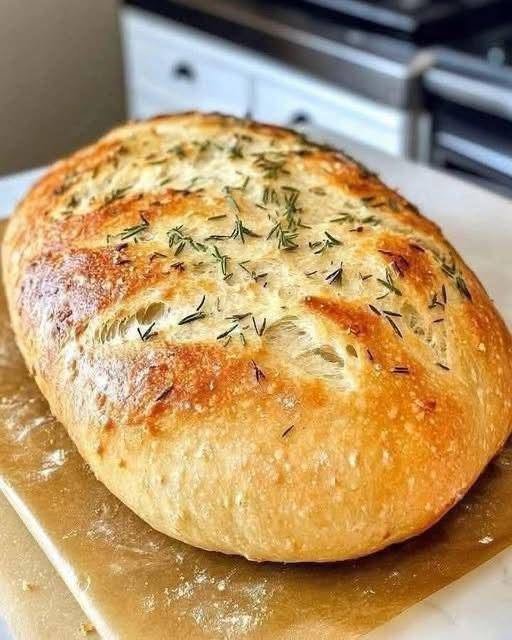
Let’s be real—most people think sourdough is some elite-level baking project that eats up your entire day. Not this one. This no-knead sourdough keeps things chill while still turning out a legit, bakery-style loaf.
You still get that golden, crackly crust, that light, holey interior, and that bold, tangy bite—but without wrestling dough or overthinking every step. No stand mixer. No arm workout. Just time doing its thing.
This method leans on slow fermentation instead of effort. The dough basically builds itself while you go about your day. Whether you’re just getting into sourdough or you’ve baked a few loaves already, this approach hits that sweet spot between easy and impressive.
Why This No-Knead Method Actually Works
Old-school bread recipes depend on kneading to build structure. Here, time and hydration take over.
As the dough rests:
- Natural enzymes break things down
- Gluten forms on its own
- Fermentation develops structure and depth of flavor
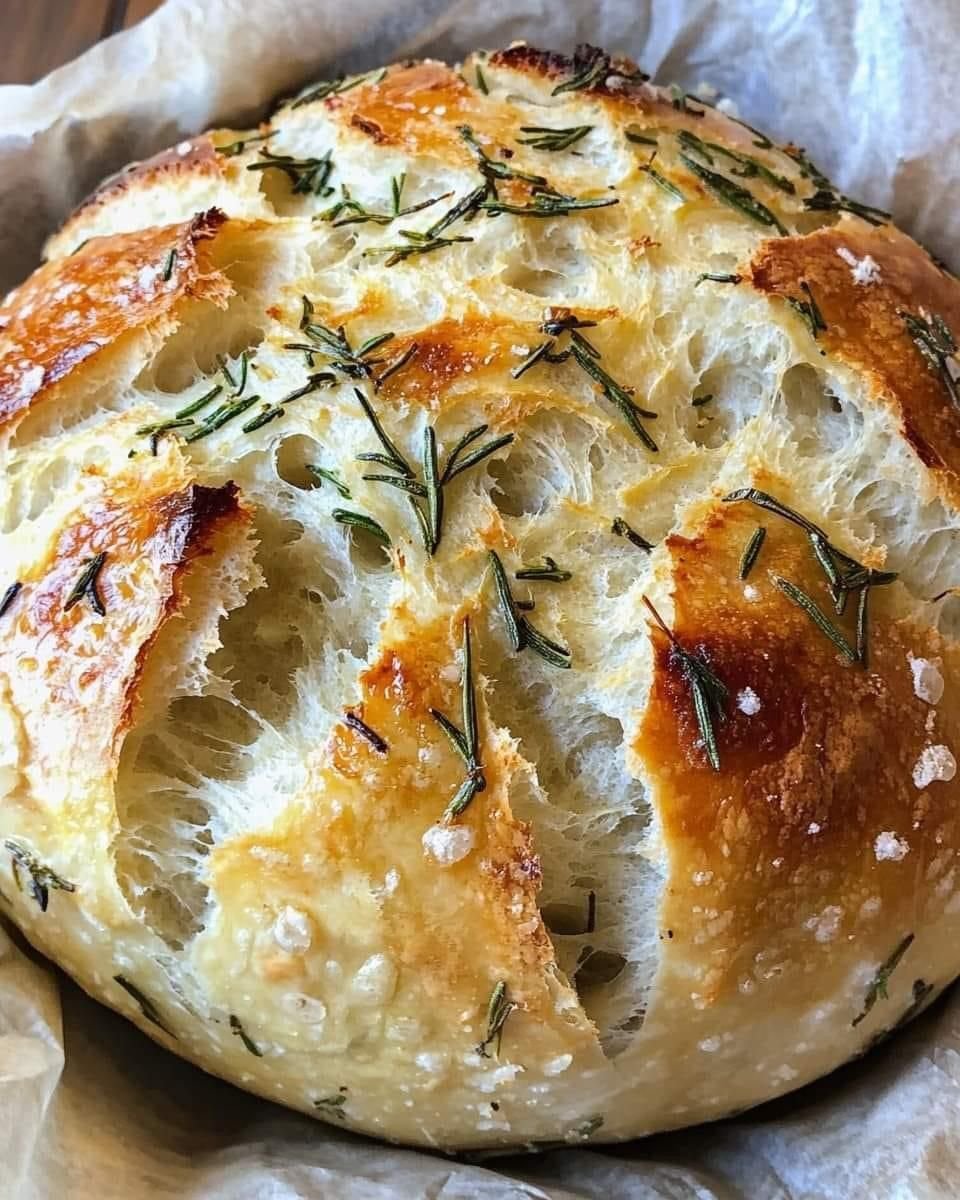
End result? A loaf that looks and tastes like it came straight out of an artisan bakery—without the grind.
What You’re Getting:
- Barely any hands-on work
- Rich, developed flavor from slow fermentation
- Light, airy crumb with that signature chew
- Crisp, golden crust with a slight crackle
- A process that fits into a normal home routine
Sourdough thrives in this kind of low-effort, long fermentation setup. It’s basically what it was made for.
Ingredients
For the dough:
- 100g active sourdough starter (bubbly, recently fed)
- 375g water (room temp)
- 500g flour (bread flour or all-purpose both work)
- 10g fine sea salt
That’s it. No extras, no fillers—just the essentials.
Gear You’ll Want
- Large mixing bowl
- Spoon or dough whisk
- Kitchen scale (seriously helps with accuracy)
- Towel or plastic wrap
- Dutch oven or heavy oven-safe pot
- Parchment paper
- Bench scraper or spatula
Step-by-Step (No Stress Version)
Step 1: Mix It Up
In a bowl, stir together your starter and water until mostly combined.
Add flour and salt, then mix until everything comes together. It’ll look rough, sticky, and kinda messy—that’s exactly right.
Cover it and let it sit for 30 minutes. This rest period helps the dough hydrate and start building structure naturally.
Step 2: Quick Stretch & Fold (Optional but Worth It)
Instead of kneading, you’ll do a few light folds:
- Wet your hand
- Grab one side of the dough
- Stretch it up and fold it over
- Rotate and repeat a few times
Let it rest 30 minutes, then repeat this 2–3 more times over the next hour or so.
This step levels up the texture—but even if you skip it, you’ll still get solid results.
Step 3: Let It Rise (Bulk Fermentation)
Cover the dough and let it sit at room temp for about 4–6 hours.
What you’re looking for:
- Noticeable rise (around 50–75%)
- Slight dome on top
- Air bubbles forming
It should look lively—not flat or overdone.
Want deeper flavor? Pop it in the fridge after a few hours and let it sit overnight.
Step 4: Shape It
Lightly flour your surface and gently turn out the dough.
Shape it by pulling edges inward and tightening it into a round or oval. Don’t over-handle it—you want to keep that air inside.
Place it seam-side down on parchment paper. Let it rest while your oven heats up.
Step 5: Heat Things Up
Put your Dutch oven in the oven and preheat to 475°F (245°C) for at least 30 minutes.
That blast of heat is what gives sourdough its signature crust.
Step 6: Bake
Carefully transfer your dough (with parchment) into the hot pot.
Score the top if you want that classic look.
- Bake covered for 30 minutes
- Then uncover and bake another 15–20 minutes
You’re aimin for a deep golden crust and an internal temp around 210°F.
Step 7: Let It Cool (Don’t Skip This)
Move the bread to a rack and let it cool for at least an hour.
Cutting too early = gummy texture. Let it set properly.
Pro Tips (That Actually Matter)
- Use a strong starter – If it’s not active, your bread won’t be either
- Sticky dough is good – That’s how you get those open air pockets
- Watch the dough, not the clock – Sourdough runs on feel
- Steam is key – Covered baking = better rise + crust
Flavor Upgrades
Switch things up once you’ve got the basics down:
- Whole wheat blend – Swap in up to 30% whole wheat flour
- Garlic & herb – Mix in fresh herbs and garlic during folding
- Seeded loaf – Add sunflower, sesame, or flax
- Olive mix – Toss in chopped olives + a little olive oil
Storage
- Room temp (wrapped): up to 2 days
- Fridge: up to 5 days
- Freezer (sliced): up to 2 months
To refresh: warm it in the oven at 350°F for about 10 minutes.
If Something Feels Off
Dense loaf?
- Starter wasn’t strong enough
- Dough didn’t ferment long enough
Dough spread too much?
- Overproofed
- Too much water
Crust too tough?
- Baked too long uncovered
Gummy inside?
- Cut too early
- Needed more bake time
Why This Recipe Just Works
- No kneading, no hassle
- Only 4 ingredients
- Flexible timing
- Beginner-friendly but still legit
- Delivers real artisan-style bread
- Naturally fermented goodness
Final Word
This isn’t just another bread recipe—it’s one you actually stick with.
You mix it, let time do the heavy lifting, and end up with something that looks and tastes like it came from a high-end bakery.
Crunchy crust. Light interior. Bold flavor.
Once you get the rhythm down, it becomes second nature—and honestly, kind of addictive.